Showing posts with label Interesting. Show all posts

Composite Portraits with a Mythical Creature

Composite photography, layering together multiple images to make one, has long been used in the world of commercial photography as a way to produce perfectly composed photographs that would be too difficult to create in one shot. As more and more people are beginning to see the benefits of composite photography, the technique is finding it’s way into other styles of photography as well including portraiture. Composite photography opens up the door to creativity for many photographers, including this one who went so far as to build his own mythical creature to add to a young boy’s portraits. Take a look.

Bakster, the friendly mythical creature featured in the photoshoot was built using spray foam and faux fur. In real life, Bakster is only 3-feet tall; however, thanks to composite photography, Bakster appears to be much, much larger. In the video we see him towering over a building, an effect made possible by photographing him in studio then layering that image into the alley scene.

Winter Lifestyle Fashion Photography

Ever wonder what it was like to take a fashion photoshoot outside on a blustery, winter day? Below, you can take a behind the scenes look at a shoot that has done just that. Join photographer, Chris Lambeth, and his crew as they take to the snow covered streets with their model for the day, Mary. Take a look below and enjoy the outdoor photoshoot from the warmth of your home.
Lambeth captured a plethora of stunning portraits during the shoot. The following images are just a small sampling of the winter fashion shoot goodness:
fashion photography

Aerial Photography - 5ive Tips

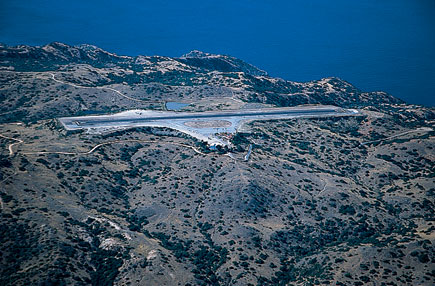
The world looks different from the air, and aerial photography thus offers some unique photo opportunities.

If you're not a pilot, probably the best way to get aerial photos through a flight school at your local general-aviation airport. Training planes can fly fairly slowly, and the instructors will be familiar with the area's airspace, and experienced at flying from either front seat (with some planes, only the window on the pilot's side can be opened).

High-wing airplanes are generally considered best for aerial photography, because the wing is above the cockpit, out of the way when you're shooting downward. However, most high-wing planes have wing struts, and many have fixed landing gear, both of which can get in the way. You can work around wings, struts and landing gear--I've done nearly all of my aerial photography from a low-wing plane, by aiming the camera midway between the wing and the nose of the plane. Sit in the airplane you're going to use on the ground, open the window, and try different camera positions and lens focal lengths to see what will work best with that particular aircraft.

More important than wing configuration is that you can open a window in-flight, so you don't have to shoot through the plexiglass. Shooting through the plastic will result in reflections, decreased sharpness, and a color cast if the plastic is tinted. If you can't open the window, move the camera as close to it as you can without touching it, and shoot straight through the window, not at an angle to it. It's also a good idea to wear black clothing and use a black cloth to minimize cockpit reflections. Don't let the lens touch the window, frame or other part of the aircraft--vibrations will be transferred to the camera, causing unsharp images. And don't stick the lens outside the plane--the rushing air can pull the camera right out of your hands, and will almost certainly tear off the lens hood.

If you are a pilot, remember that your first job is "pilot." Fly the plane, and watch for traffic. When you arrive at the target area, slow the plane to a safe speed, trim it for hands-off flight at that speed, check the area for traffic, take a shot, check for traffic again, check airspeed and altitude, take another shot, etc. Don't get so involved in shooting that you stall the plane or forget to check for traffic.

I have the large advantage of being the pilot on my aerial photo flights, so I can just fly the plane where I want it for each shot. If you go up as passenger, discuss beforehand with the pilot what you want to do, and establish a communication system. An intercom with headsets is invaluable here--it's noisy in flight, especially with a window open.

Don't look through the camera for long periods of time in flight, especially while the aircraft is turning--you'll likely get airsick. When you spot a subject, have the pilot maneuver the plane into position, then bring the camera up to your eye and take the shot.

It can get cold aloft with the window open. Consider the temperature (it usually gets colder the higher up you go), and dress accordingly.

When photographing subjects on the ground, use manual-focus mode and set focus at infinity, then tape the focusing ring there so it doesn't accidentally move.

While I do most of my shooting these days with digital SLRs, I still prefer film for aerial work--generally Kodak Ektachrome E100VS or Fujichrome Provia 100F or Velvia 100F, all pushed a stop to EI 200 to provide faster shutter speeds and more contrast. Aerial photos generally lack contrast and color saturation, due to the haze between camera and subject--you'll be at least 500 feet from subjects on the ground (1000 feet in populated areas), and I'm often shooting from several thousand feet up during cross-country flights. If I need more speed, Fujichrome Provia 400F is the finest-grained high-speed slide film, and I also use Ektachrome E200 pushed to EI 400 or 800 at times.

A polarizing filter can help cut through haze (but not smog, which actually consists of particulate matter) and improve contrast, but I rarely use one.

1. The Best Time
As with all photography, lighting is a big factor. For aerial photography, the lighting is best early and late in the day, when the low-angle sun creates long, dramatic shadows. Ideally, you also want a clear and smooth day, because hazy weather makes for murky photos, and turbulence causes image blur and missed compositions. Unfortunately, clear days are generally that way because of strong winds, and strong winds make for bumpy flights. I've got a few good shots on bumpy days (also a lecture from air traffic control when I accidentally keyed the yoke-mount microphone button as a strong gust hit just as I shot, causing me to blow blew yet another composition, and I apparently muttered something untoward). If you're up there and see something good to shoot, by all means, shoot it; but I wouldn't deliberately set out on an aerial photo flight on a bumpy or hazy day.
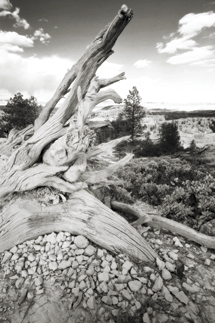
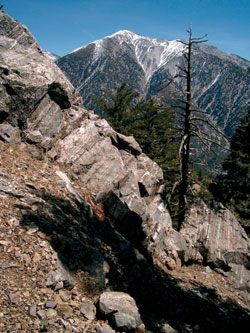
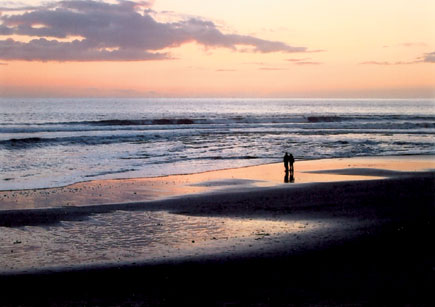
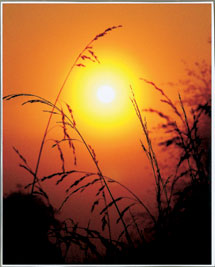
Aerial photography is basically landscape photography, and the lighting is best early and late in the day, when the sun's light is warm and shadows are long (top). Midday sun 
produces flat lighting that's good for record shots, but pretty dull (bottom).

Action Photography - Capturing the Moment

This is an excerpt from the book “Sports Photography: How to Capture Action and Emotion” by Peter Skinner.
Australian butterfly swimmer Pierce Hardy of Caloundra, Queensland, powers to the end of the pool. Swimmers are best photographed as they burst above the water. Nikon D1X, ISO 200, 300mm f4 lens, 1/1000 at f5.6.
© 2008, Peter Skinner, All Rights Reserved

Virtually every day we see great sports action photographs in newspapers and magazines. As the term implies, the photographers who made these images have truly “captured the action.” Because we see them so often, it can be easy to overlook the skill and talent involved in producing these attention-grabbing photographs. While luck might be involved in making great sports shots, invariably luck favors the photographer who knows what to expect, and is well prepared to capitalize on that fleeting, never-to-be-repeated moment when something extraordinary happens.

Pre-focusing on a spot and anticipating the peak of action is part of a successful formula for Brian Robb. Here downhill skier Lindsey Kildow, USA, competes in the 2005 US alpine championships at Mammoth, California. Canon 1D Mark II, ISO 160, 300mm f2.8 lens with 1.4x extender, 1/1300 at f7.1.
© 2008, Brian Robb, All Rights Reserved

Action Photography - Capturing the Moment | Part II

Know the course and the best vantage points. Keep in mind the time of day, the angle of the sun and how long that spot is likely to be well lit. Ask officials about the course layout. These people want coverage of their events and will probably do what they can to help you but don’t leave the approach to the last minute! Also, ask if and when access to any part of a course might be closed. Rushing to a great location only to find it is off limits would be frustrating, to say the least.

Once you’ve selected the best vantage spots get the approximate times that athletes will get there after the start and how many circuits will be made. An elevated vantage point can be handy and you can even take your own, such as a small, lightweight stepladder, an aid that Bob Woodward uses often.
Track events are bounded by lines and lanes, elements of graphic design that the well-trained eye can harness. Duane Hart has done just that in an overhead view of the start of a race at the 2000 Olympic Games. Canon 10D, 200mm f1.8 lens, ISO 100, 1/1000 at f4.
© 2008, Duane Hart/sportingimages.com.au, All Rights Reserved


Still Life Photography - Four Tips

Throughout the decades, artists have depicted still life scenes--arrangements of inanimate objects--in paintings and photography. Shooting still life subjects is one of the best ways to sharpen your photographic skills. You can take your time, and your subject remains stationary. Good composition, framing and lighting are all very important to translate your still life into a great photo.

Reader photo by Tom Reich, Tuscon, AZ

Study Good Photos
Every day we are bombarded with still life images of appetizing foods, shiny housewares and other appealing products in magazine ads, brochures and catalogs. Professionals spend a great deal of time setting up these shots and you can learn a lot just by studying the photos you find most appealing and unique. Notice how photographers use repeating shapes and lines to create patterns and use complimentary colors. Study the lighting that they use. One of the best things you can do before you shoot still lifes is to collect images that inspire you.
Reader photo by Kenneth A. Deitcher, Albany, NY

Enhancing Outdoor Portraits Using Fill Flash

When the weather is nice outdoors, nothing beats an informal portrait. You do not want to shoot in the direct sunlight because your subject will be squinting. However, if you can find a shady spot under a tree, both you and your subject will be much happier.

So, how can you take the best portrait outdoors and still compete with the sun? The answer is usually right on top of your camera—the flash. You may not want to use the full intensity of the flash to combat the effects of the sun, but depending on your subject’s location, time of day, and hair color, you probably have more control than you think.

Grouping subjects by hair color, I’ll explain what techniques have worked for me on the warmth of a summer day and in the crispness of a colorful fall day. Beginning with brunettes, I usually have females sit under a tree and look up at the camera. They will be in shade because of the tree and the only ambient light is what is bouncing or reflecting off the ground. Knowing that dark colors absorb light (like dark hair) and lighter colors reflect light (blonde hair), I adjust my flash accordingly. Keep in mind the distance from your subject (I’m standing, she’s sitting) and their skin tone.

Here are a few rules to keep in mind: direct sun rarely works well; instead choose a shady spot and let your compensated flash be your fill light source. It provides the needed illumination plus benefits such as sparkling eyes, daylight-balanced skin tone, and less background/subject exposure variations.

I will always use the flash outdoors to fill in the shadows created by the sun, but in this case, I wanted to add illumination to the shot and make her eyes sparkle. This will be one of the few times I will use the fill flash at full strength. In this instance, the flash lightens her skin slightly, creates a twinkle in her eyes, and causes a mild shimmer to her hair.
Chris was placed in the shade of a tree with a much brighter background. Still using the flash as fill, I backed down the flash compensation to -1 EV. I don’t want the flash at full power because his skin tone is light and I want to avoid overexposure. The camera’s flash is daylight-balanced (5600?K) and an overcast day often causes a blue cast. The warmth of the flash added a little color to his light skin.
Abbie—Dark Hair, Brown Eyes, Olive Skin
Chris—Light Skin, Dark Hair, Light Beard

Creative Look - Combine Your Images

I had a thought (it happens!) back in the `80s. I was thinking how great it would be to create a portrait piece of someone that combined several images together to show the many facets of that individual. Let's take an example. Suppose you were commissioned to do a portrait of a young man. His interests may include playing football, swimming, sailing, playing guitar, etc.
"Morning Ritual"
The clients own a Coffee company so this brought on the theme. The image is composed of 8 separate photos, one of each client, the cup, the pot, and 2 separate hands. A plain Rembrandt background and several smoke photos were used; the rest was cut and pasted and blended in Photoshop.
© 2007, Craig Kienast, All Rights Reserved
My thinking was to photograph this individual while he was doing these activities, and somehow combine all these images together into one super image with all the individual ones. Great idea, right? Man, I thought, I could get paid a fortune for doing this kind of work! The only problem was, I couldn't figure out how to do it! Make a few small prints and tack them up and copy them? Not quite the elegant image I was going for. Print them on one piece of paper using masking techniques? Possibly, but not an easy task for someone not owning a color lab. Do a "brain shot" like at weddings, where you put the bride's face in the groom's head? Yuck! Oh well, nice idea, but just too complicated and time consuming. Time to move on.
This shows the 2 images to combine for the final result.
© 2007, Steve Bedell, All Rights Reserved
Fast forward to 2006. Film is fast becoming a memory, and anyone with image-editing software is capable of combining images to create spectacular effects. Of course, the key word here is capable, because the old computer axiom of "Garbage In, Garbage Out" is especially true of today's digital photographer. But in the hands of a skilled artist/photographer, wonderful things can happen.
This is the final image from the studio shot and some weeds blended together. (Model: Bridget Brunet.)
© 2007, Steve Bedell, All Rights Reserved

From Color To Black & White In A Few Steps - Plugins

One of the reasons photographic purists usually refer to black and white prints as “monochrome” is that it’s a more precise descriptive term that also covers images produced in sepia and other tones. There is much more to black and white photography than simply an absence of color. Maybe we wouldn’t feel this way if the first photographs had been made in full color but that didn’t happen. Like many photographers, I grew up admiring the works of W. Eugene Smith and other photojournalists who photographed people at work, play, or just being themselves, all in glorious black and white.
© 2003, Joe Farace, All Rights Reserved
© 2008, Joe Farace, All Rights Reserved
One of the advantages of working with monochromatic digital photographs is the original image can come from many sources. Some digital cameras have Black and White or Sepia modes for capturing images directly in monochrome but more often than not they capture these photographs in RGB. Yup, it’s a color file without any color! You can also capture your images in color, then use any of the software that I’ll introduce you to and convert that full color photograph into a monochromatic one. As a creative medium, traditionalists may still call it “monochrome” while digital imagers may prefer the computerese “grayscale,” but, to paraphrase Billy Joel, “It’s still black and white to me.”

One of my favorite ways to convert a color file into monochrome is to use Photoshop-compatible plug-ins. You can always use the Black and White New Adjustment Layer (Layer>New Adjustment Layer>Black & White) in Adobe’s Photoshop and it’s a pretty good tool as far as it goes, but this story is about monochrome conversion plug-ins.
© 2006, Joe Farace, All Rights Reserved
Monochrome Conversion
Nik Software’s (www.niksoftware.com) Silver Efex Pro is a Photoshop- and Aperture-compatible plug-in that offers emulations of 18 different black and white films from Agfa, Fuji, Ilford, and Kodak, along with a grain engine that mimics the traditional silver halide process. In the Film Types area on the right-hand side of the stunningly designed interface, you’ll also find controls for Sensitivity and Tonal Curve, allowing fine-tuning of the conversion.

The plug-in uses Nik Software’s patented and insanely cool U Point technology, borrowed from Nikon’s Capture NX software, that allows selective control of an image’s brightness, contrast, and structure, adding another level of control. By placing points on specific parts of the photo you can control how much of the effect is applied to only those areas. When making the final monochrome conversions, Silver Efex Pro uses algorithms to protect against creating unwanted artifacts. The plug-in costs $199.95, and works with 8- and 16-bit images, RGB, CMYK, and LAB color spaces, and is compatible with Photoshop’s Smart Filters feature.
You can work with Nik Software’s Silver Efex Pro on two levels: You can use the one-click presets in the Style Browser (left-hand side) or you can manually shift gears by using the controls on the right-hand side. Here you’ll find access to control points, color filters, specific film responses, and a stylizing menu that lets you tone and vignette. Style Browser provides an overview of all of the available styles, with thumbnails showing each style’s effect on the image. The interface also has a digital loupe, to let you check out specific image details.
© 2003, Joe Farace, All Rights Reserved

Depth of Field - 4our Tips

When you focus your camera's lens on a subject, the point focused upon is sharp. Objects in the scene closer or farther than that point appear progressively less sharp as their distance from the focused point increases.

Depth of field refers to the area in front of and beyond the point focused upon in which things appear acceptably sharp in a photograph. Depth of field is really an illusion: Again, the point focused upon is sharp; everything in the scene closer to or farther from the camera is less sharp. Depth of field is based on the fact that our eyes can't differentiate between dead-on sharp and almost-sharp until the lack of sharpness reaches a certain degree. Within depth-of-field limits, objects in the photo will appear sufficiently sharp at normal viewing distances for the print size.

Depth of field affects every photograph. So it's a good idea to put it to work for you, rather than just leave it to chance. You have three controls over depth of field: aperture, focal length, and focusing distance. Smaller apertures increase depth of field, while larger apertures decrease it. Shorter focal lengths increase depth of field, while longer focal lengths decrease it. And greater focusing distances increase depth of field, while shorter focusing distances decrease it.
Shooting at the lens' smaller apertures provides greater depth of field, handy when you have important subjects in the scene at different distances from the camera
Photo by Mike Stensvold
1. Great Depth of Field
Great depth of field is handy when you have several important subjects in a scene, each at a different distance from the camera. It's also useful when you want to get an entire three-dimensional subject sharp, rather than just a portion of it.

Compositions Simplified

Good photographs needn't be complicated.

You can often make better pictures by thinking "simple."

Instead of trying to get as much as possible into the shot, try to include as little as possible. Ideally, you should include everything that adds to the picture, and nothing else. But that's a tall order for those new to photography (and for a few "old hands."). Thinking "simple" will help you learn to do it.

If you include too much in the picture, the result is confusing. It gives the viewer too much to think about. He or she probably won't even be able to figure out where to start.

A simple composition, on the other hand, allows the viewer to take it in quickly and effortlessly. Then his or her mind can find a starting point for his or her own "tour" of the picture, for their own questions: In the case of the bench photo on the next page, Why is this bench empty? Who is the bench for? What country is this? The viewer's adventure begins.
Negative space helps keep compositions simple, directing the viewer's attention to the subject--and providing room for heads and body copy in shots for feature articles.
Photo by Mike Stensvold
The photographer came across a weathered bench in front of a building with some shuttered windows. And that's just what he shows the viewer. He didn't try to include the whole building, or its surroundings. He simplified the photo by including only the bench and two shuttered windows. (He made this photo with an Advanced Photo System point-and-shoot camera, by the way--you don't need fancy gear to get good shots.)

Striking Sunsets- 5ive Tips

The word photography literally means "painting with light." Thus, twilight is one of the best times to take pictures, as the light at that time is magical. You can capture colorful clouds at sunset time, silhouetted objects against a colorful sky, or the sparkling lights of a city at dusk. Even though you'll need to go to a little extra effort to obtain great results, it's worth doing this to successfully capture one of nature's grandest spectacles.
Camera Support
Because you'll be working under dim lighting conditions, you should invest in a good tripod or monopod. Some manufacturers have even created small beanbags to steady lightweight point-and-shoot cameras. There are also times when you can brace your camera against a rock or on top of a fence. In any case, avoid the blurred images that occur when using a slower shutter speed while hand holding your camera. Lacking a camera support, use fast film in the 400--1600 range, or use an equivalent ISO setting on a digital camera.
Reader photo by Sue Copeland, Cupertino, CA
Look For Silhouettes
It's always a good idea to scout a location in advance for subjects suitable for silhouettes. Look for simple, recognizable shapes, such as trees, mountains, or even a structure on a beach. It's also important that your subject be surrounded by the brightly colored sky. A fisherman on the beach at sunset is an identifiable shape, but fishing boats lined up too closely in a row may merge into a dark cluster. Any subject that you position in the foreground of a sunset sky will be silhouetted unless you use flash to illuminate it. The dark blue sky after sundown on a clear day, or the pink and orange clouds after sunset on a cloudy one, make great backdrops for silhouettes.
Reader photo by SHerrill Lynch, Countryside, IL


Morning Photography Tips - 6ix

Morning conjures up thoughts of beautiful sunrises, the start of a new day, and perhaps brewing a cup of coffee while reading the newspaper. Photographers enjoy shooting early in the morning (and late in the day) for dramatic light. When shooting outdoors, the light is especially beautiful during the half-hour or so after sunrise. These early-morning hours can provide great lighting as well as the opportunity to photograph scenes before the crowds arrive. Additionally, industrial pollutants haven't had a chance to settle in, making scenes even clearer than at dusk.

The color of light changes throughout the day, and has a warm cast early in the morning.
Reader photo by Charlene Samsel, Nescopeck, PA

1. Color Of Light
Our eyes adjust to the changing color that sunlight provides throughout the day. Nonetheless, film and digital sensors record the color of light the way they're designed to see it. In the morning, the colors can range from a yellowish to rosy orange at sunrise. A neutral mix of colors occurs from mid-morning on a clear day, although shady areas will be tinged with blue. It's important to recognize the changing color of light in order to compensate for it with film, or with your digital camera's white-balance setting.
When shooting near dawn, you may want to bracket exposures to ensure good results.
Reader photo by Marie LaPlante, Springfield, VT

2. Use Silhouettes
If you're photographing a sunrise, try to utilize an interesting foreground element against a colorful sky. A sky with beautiful oranges and reds can often be striking alone, but a foreground element can take your photos a step further by adding a center of interest and revealing something of your location. At dawn and dusk, a foreground subject will usually be rendered as a silhouette, so look for simple and easily recognizable shapes. A single person jogging on a road early in the morning, for example, may be a good subject for a silhouette.
At sunrise, foreground subjects will be rendered as silhouettes.
Reader photo by John Matthews, Harrogate, TN

Tips For Shadows In Your Clicks - 5ive

Photography is all about light. But wherever there's light, there are shadows lurking nearby. And therein lie some great photo ops.

Exposing Shadows
Contrasty shadow scenes can fool reflected light meters, such as those built into cameras. A spot meter enables you to meter the most important highlight area, and determine an exposure that will give detail there (try two stops more exposure than the highlight reading calls for). It's generally fine to let the shadows go black; if you want detail there, too, you'll probably need to use the Zone System--or Photoshop's Shadow/ Highlight feature. With the multi-segment meters built into today's SLRs, you'll have to experiment to see how your specific camera handles shadow scenes--with some scenes, multi-segment meters work very well, with others they don't.

It's a good idea to bracket exposures when you start doing shadow images.

1: Shadows Add Impact
Soft light is easy to work with, primarily because it produces soft shadows. If you didn't get the main light in the right place, there are no harsh shadows to whump the viewer upside the head with that fact. But soft light also lacks impact. Harsh shadows--in the right place(s)--can add impact and drama to a photograph. The best source of harsh shadows is direct sunlight outdoors. But you can create strong shadows with direct light sources in the studio, too, such as direct electronic flash or tungsten lamps.

The contrast between sunlit fog and unlit trees adds drama to this early-morning scene.
1
All photos by Mike Stensvold unless otherwise indicated


2: Show The Subject A Different Way
For a different sort of image, make the shadow the main subject of the photo, or photograph only the shadow, without including the subject.

This self-portrait was "discovered" on the side of a store near the end of a hike. Keep your eyes open for such photo ops in your wanderings.
2

Tips To Get Point Of Interest Stand Out - Se7en

What and how to get a Prominent Point of Interest in Photography

Point of Interest is the gravitating aspect that will draw the viewers to a certain point of the photograph. Ideally, there is one point of interest (POI) in a photograph to ensure its viewers are able to understand the message conveyed by the photograph. There are several techniques to ensure the photograph’s viewers comprehend the POI:


1. Fill the Frame
By filling the frame with the main object, the object will inevitably be the center of attention. There are several ways to fill the frame with the main object of the photograph. Some of these include:
- Photographing closer to the object.
- Using a telephoto lens or zoom.
- Cropping.


Point of Interest in Photography - Fill the frame


2. Depth of Field
By adjusting the Depth of Field (DoF), the main object will appear sharp while the surrounding environment becomes blurry in contrast. This ensures the clarity of the point of interest. To obtain a thin Depth of Field, the steps that can be taken are:


- Set the lens to its widest aperture (lowest digit).
- Use the farthest zoom range (tele-end).
- Distance the object with its background.

Point of Interest in Photography - Shallow Depth of Field

Amazing Patings in 3D

Marchal Mithouard (aka Shaka) is a French artist whose paintings literally pop out off the canvas into the world. To create his pieces, Mithouard first creates a bas relief of his figures on canvas, then paints them in his multi-colored, street art style.
Marchal Mithouard started as graffiti artist whose work gradually evolved from basic to a unique brand of three-dimensional street art. Using exaggerated perspective and realism, Mithouard aims for his human figures to jump out at the viewer. His paintings appear to have an underlying theme of revolt and rebellion.
His foremost influences, he says, include Vincent van Gogh, Le Caravage and Expressionism.

marchal-mithouard-1
marchal-mithouard-1

I SHOOT RAW..! How Important Is That?


Are RAW Files Important in Digital Photography

Many modern cameras feature the RAW file format. This feature may be one of the pivotal reasons why you’ve bought that specific camera, or you may be one of those who never use this feature. For professionals, photographing using RAW is a must. But for beginners, is this feature really that important? The short answer is yes. Find out the “why?” in this post.


RAW file format is the original file produced by the camera’s sensor that hasn’t been digitally processed by the camera. In short, these RAW files are literally the raw files that are substantially larger in file size and are not yet ready for consumption, unlike its JPEG counterpart. Not all cameras have this RAW file feature. Generally, they only provide the JPEGs. Because RAW files are produced directly from the sensors, every camera with different sensor technologies has RAW files that are different. Unfortunately, these different RAW files aren’t compatible with each other and processing them needs supporting RAW processing software for that specific type of camera.


RAW files contain brightness information captured by each pixel (in 12 or 14 bits) and has passed through the color filter (RGB). These files are usually sized at 10s of MBs and uses different names according to their producers. Nikon DSLRs uses NEF and Canons use CR2 as their file names. Having RAW files are like having the negative films from the camera and the post-process done in the computer is like the post-processing done in a dark room.


RAW files are original files that haven’t gone through the internal camera process of:

Take Perfect Lightning Pictures


How to Take Spectacular Lightning Pictures 


Photographing a lightning is a dangerous hobby. What most people do not understand, is that lightnings are unpredictable and they could strike down any time, anywhere. At the same time, taking a picture of a lightning storm can be very rewarding, especially if the lightning pattern is unique or the picture is taken at an extraordinary location.


1. Use a Steady Surface
While a tripod typically works best, in reality any steady surface will work. Some people use a beanbag or other malleable item, like a pillow.


2.Prepare Your Gear
If you want a very good picture of lightning, a DSLR with a tripod is almost a must. If you have a point and shoot, make sure that the camera can be configured for manual control of shutter speed and aperture. Some people are lucky to have a good image of a thunderbolt in hand, but I strongly advice to use a tripod instead. Depending on the amount of ambient light, you have to use a shutter speed between 30 to 30 seconds and shake any potential negative impact on image sharpness. Either lens would work, but wide angle and zoom lenses work best because you can put more while having the flexibility to change the focal length and target a specific area. A remote cable release or an infrared remote (depending on your camera) is strongly recommended if you want to avoid camera shake, even on a tripod. If the lightning is far away, having a flashlight with you might be useful, since you can “paint” your foreground subject to make the whole scene look more dramatic.


3.Slow Shutter Speeds

20 photography tips for DSLR users

This article lists 20 tips to get started with DSLR photography. It is particularly useful to those who are used to point-and-shoot digicams and now want to take the next step in their photography skills.

We used the DSLR cam as if it were a point-and-shoot snapshot cam in automatic mode, not knowing about the power of the various manual controls. The fact that some of our pics turned out nicely, says more about the camera than it says about our skills.

By experimenting a bit and reading a few books, I now know more about DSLR photography, and we hope to put this in practice. Most people know from experience that when it comes to services that could be anything from those provided by o2.co.uk to computer lessons or software or bits of equipment, that having some tips from a fellow user can come in handy. The DSLR is not hugely complicated to use but it does take some time to get used to. Hopefully with the following information you should be able to cut a few corners while you learn. I'm still a beginner though, so here's a beginner passing on beginner tips to those who are just beginning with DSLR photography :)

1. Landscape composition
If you're shooting landscapes, there is a very easy rule to follow: the rule of the thirds. The idea is simple: 1/3 or 2/3 of your image should make up either the sky or the foreground, depending on where you want to put the focus on. This gives the photo more depth and a more dramatic look. It's a simple tip but beginners often position the horizon at exactly 1/2 of the photo.
Below is a photograph with the horizon at roughly 1/2 of the photo. Quite dull, and without any depth:


The next one focuses on the foreground, with the foreground at 2/3 and the sky at 1/3. Notice how this increases the depth:


Do faster than light neutrinos let you change the past?

There's been a lot of hubbub about the possibility of FTL neutrinos. But would breaking the light barrier really be such a big deal? Hell, yes, it would! In this week's "Ask a Physicist," we'll find out why.

Why the change? A few weeks back the OPERA experiment announced that they had apparently measured neutrinos traveling faster than light. There was an enormous amount of excitement, both here and elsewhere, but also a lot of skepticism. My position: I'm not buying it.
But are faster than light particles really such a big deal?
They sure are. FTL communication results in nothing less than being able to communicate to the past, and produces all of the complexity and paradoxes of good old fashioned time travel.
Jason Honan asks:
Even if the communication took place instantaneously, I don't see how one would use that to communicate with one's own past. Can you explain it in plain English?
Specifically, Alice and Bob want to chat, Bob sends a message and N seconds later, Alice sends a reply. Even if the transit time for the message were zero, N seconds have still elapsed for both individuals. How does a superluminal transit speed equate to negative elapsed time? Wouldn't, at best, a message have a zero delay?"
Related Posts Plugin for WordPress, Blogger...