Tips To Get Point Of Interest Stand Out - Se7en

What and how to get a Prominent Point of Interest in Photography

Point of Interest is the gravitating aspect that will draw the viewers to a certain point of the photograph. Ideally, there is one point of interest (POI) in a photograph to ensure its viewers are able to understand the message conveyed by the photograph. There are several techniques to ensure the photograph’s viewers comprehend the POI:


1. Fill the Frame
By filling the frame with the main object, the object will inevitably be the center of attention. There are several ways to fill the frame with the main object of the photograph. Some of these include:
- Photographing closer to the object.
- Using a telephoto lens or zoom.
- Cropping.


Point of Interest in Photography - Fill the frame


2. Depth of Field
By adjusting the Depth of Field (DoF), the main object will appear sharp while the surrounding environment becomes blurry in contrast. This ensures the clarity of the point of interest. To obtain a thin Depth of Field, the steps that can be taken are:


- Set the lens to its widest aperture (lowest digit).
- Use the farthest zoom range (tele-end).
- Distance the object with its background.

Point of Interest in Photography - Shallow Depth of Field

Action Photography Tips - Three

Photographing action is quite challenging, but can also be very rewarding. The keys to success are knowing your camera, knowing your subject...and LOTS of practice. You have to be able to set focus and exposure quickly (or monitor them quickly, if using an automatic camera). In short, you can't be fumbling around trying to figure out how to apply exposure compensation or switch from single-area AF to multiple-area AF or vice versa while the action is happening. Camera operation must become second-nature.
A fast shutter speed "freezes" motion. Here, 1/5000 even froze the water droplets.
All photos by Mike Stensvold unless otherwise indicated.
It's also very helpful to know as much as possible about your subject, be it an animal or a sport. The more you know about your subject, the better you'll be able to anticipate photo ops, and be ready when they occur. Learn as much as you can about your subjects from books, online, and other sources, and by watching them yourself.


There's a lot of luck involved, too, of course. But you'll find that the more you practice and the more you learn about your subjects, the more often you'll get lucky.
TIP 1: Shutter Speed
There are two basic ways to deal with action subjects: freeze them sharply, or blur them. Using a fast shutter speed will sharply freeze the subject, while using a slow shutter speed will blur it. How fast a shutter speed it takes to freeze the subject, and how long a shutter speed you'll need to blur it effectively, depend on the subject's speed and distance from the camera, the focal length of the lens you're using, and the effect you want. The faster the motion, the closer the subject, and the longer the lens, the faster the shutter speed you'll need to "freeze" the motion.

With the foregoing in mind, it's a good idea to try a variety of shutter speeds each time you encounter a new action subject, to see which one(s) produce the best results for that subject. You'll soon learn what speeds will produce the effects you prefer.
A slow shutter speed blurs motion, which can be an interesting effect.

What To Shoot In Winter

Winter brings with it some great photo opportunities. In many areas winter means snowy landscapes and snow sports; in others, it's just a somewhat cooler and slightly wetter time of year. Here are some winter-oriented photo tips that should help you add some nice shots to your portfolio, and have some fun doing it.


1 Sun Comes Up, Sun Goes Down . . .
If you're not an early riser, or you like to get to bed early, winter is your season for sunrises and sunsets. The sun rises nearly three hours later, and sets nearly three hours earlier, in mid-winter than it does in mid-summer. So you can sleep in and still catch those neat things that often happen around sunrise (such as the alpenglow on pre-sunrise lenticular clouds shown here)—or photograph the sunset and still have time to go out for dinner and a movie. You can also capture those sunsets over picturesque parklands that close at 5 or 6 p.m. (which is well before sunset in mid-summer). Photo by Mike Stensvold

2 Different Times of Day
As the sun "travels across the sky" (which it does more quickly during the shorter days of winter), the lighting direction changes relative to landscape features. So, schedule permitting, you should check out potential subjects first thing in the morning, in midmorning, around noon, in midafternoon, in late afternoon, and around sunset to see how they look in the different lighting. Not only does the lighting direction change throughout the day, but the color changes as well, from cool before sunrise to warm just after sunrise to neutral at midday to warmer near sunset to cooler after sunset. The combination of different lighting angles and different lighting colors can make a subject look quite different as the Earth does its daily rotation. So shoot a frame (or more) throughout the day, and you'll get some interesting shots.Photo by Lynne Eodice

3 White Is White
. . . but snow isn't, always. Snow in sun is white, snow in shade is bluish, snow under an overcast sky is grayish, snow near sunrise or sunset has a warm cast. To get great snow shots, first you have to learn to see the snow as it is, and second you have to expose it properly. If you take a reading off sunlit snow with your camera's built-in reflected-light meter, the resulting photo will show the snow as gray—too dark for sunlit snow. So you'll have to give the snow more exposure than the meter calls for. How much more? That depends on how you want the snow to appear—try one stop, and bracket exposures. Soon you'll develop a "feel" for how to expose snow to show it the way you want in your photos. (Note: If the snow occupies only a small portion of the image, your in-camera meter will probably expose it correctly. But it's still a good idea to bracket exposure whenever you're in doubt. )Photo by Mike Stensvold

4 A Touch of Color
Snow is very pretty, but photographically a little snow goes a long way. You can add interest and color to snow shots simply by including a colorful object or two in your composition. The colorful object can be incidental, or the main subject of the photo. Keep your eyes peeled for colorful items to include in your snow pictures.Photo by Ron Leach

Se7en Winter Photography Tips

Winter is a wonderful time for photography.  I thought I would provide a few tips to make photography in the cold more successful.


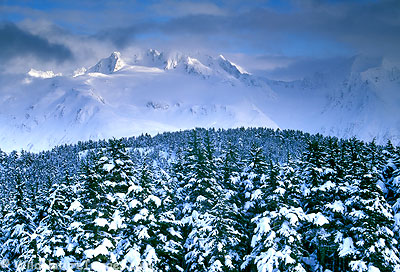
Chugach National Forest, Alaska during winter.1.  Keep your camera cold.  Although it is tempting, don’t put your camera under your jacket.  Warming and cooling your camera will cause condensation and render your camera unusable.  It is easier to brush falling snow off a cold camera as well.  Falling snow on a warm camera makes for first a wet, then a frozen mess.  But don’t don’t try to blow snow off your camera with your breath!  This too can cause a frozen condensated mess.  I have learned all these things the hard way.

2.  Keep your batteries warm.  Your camera will work fine in very cold temperatures as long as it has functioning batteries.  The cold can quickly zap the energy out of any battery, but warming them up can restore much of their power.  If I’m taking extended exposures where I can’t afford to have my camera quit such as photographing northern lights, I use a rubber band and attach a chemical hand warmer to the battery compartment.  Otherwise I keep extra batteries in a pocket inside my jacket where I can keep them warm.  Sometime I put a chemical hand warmer in that pocket to speed up the process.  I then rotate the batteries between my camera and my warm pocket.

3.  Warm your camera slowly when you return home or in your car.  If you walk into the house with a cold camera, it will instantly become covered with condensation.  Anyone who has worn glasses in the winter will know exactly what I’m talking about.  Some photographers will put their camera gear in zip lock bags and that works fine.  I just leave my gear in the camera bag and make sure I don’t open the bag for an hour of two.  The camera bag seems to be adequate for avoiding condensation.  Be sure to remove film or cards from your camera before you bring it inside so you won’t be tempted to open your bag prematurely.

Amazing Patings in 3D

Marchal Mithouard (aka Shaka) is a French artist whose paintings literally pop out off the canvas into the world. To create his pieces, Mithouard first creates a bas relief of his figures on canvas, then paints them in his multi-colored, street art style.
Marchal Mithouard started as graffiti artist whose work gradually evolved from basic to a unique brand of three-dimensional street art. Using exaggerated perspective and realism, Mithouard aims for his human figures to jump out at the viewer. His paintings appear to have an underlying theme of revolt and rebellion.
His foremost influences, he says, include Vincent van Gogh, Le Caravage and Expressionism.

marchal-mithouard-1
marchal-mithouard-1
Related Posts Plugin for WordPress, Blogger...